Exporting layers🔗
Layers can be exported for input into other Marigold projects, or as Geotiffs for use in other GIS packages.
Export a layer for Marigold🔗
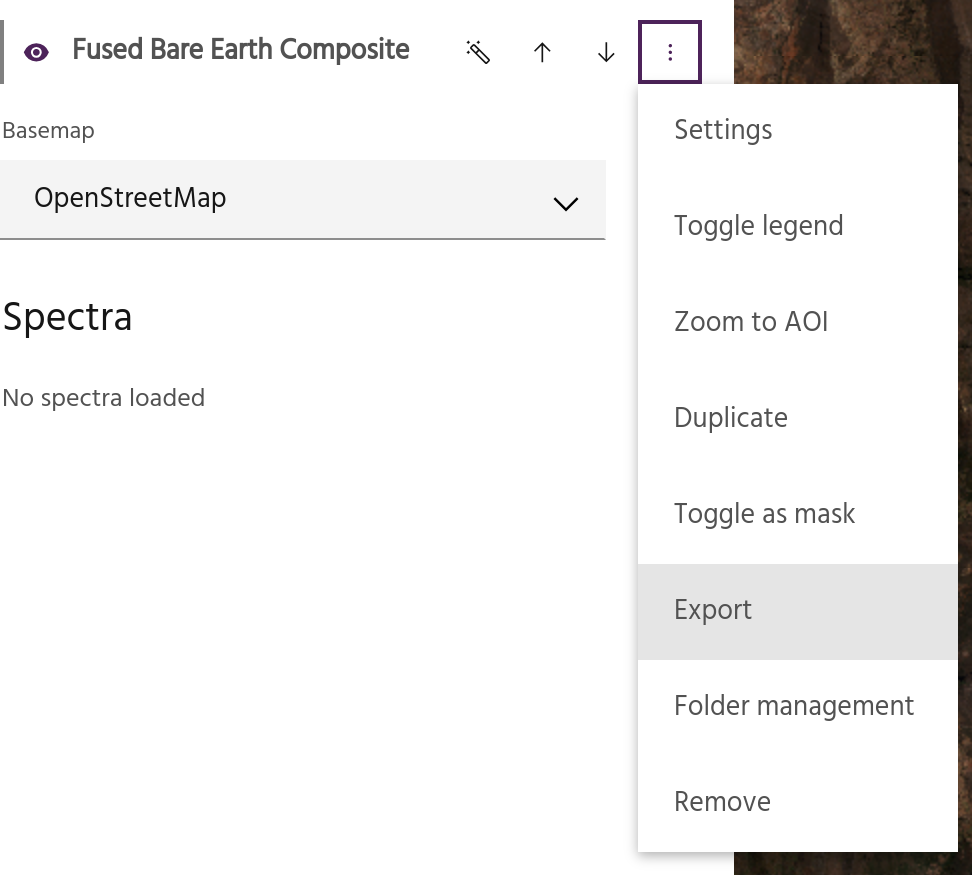
Individual layers can be exported, shared with other users, and imported into new Marigold projects.
Select Export from the layer overflow menu.
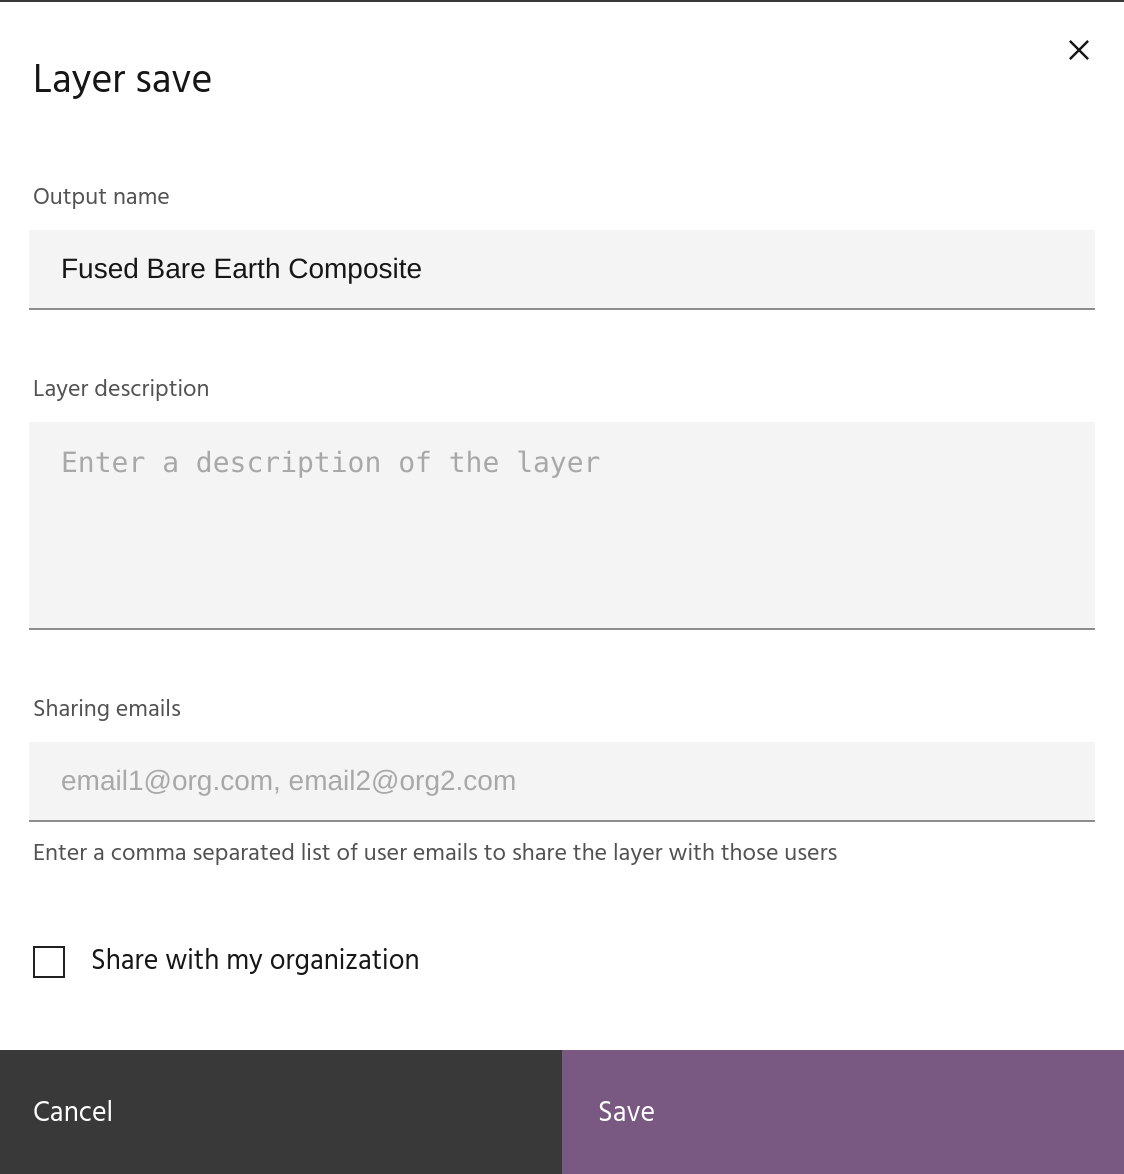
Layer name and description🔗
In the export dialog, give your layer a name and description.
Warning
Exported layer names must be unique!
Sharing emails🔗
If desired, type in a comma separated list of emails of users to share the layer
with. Shared layers will appear in their layer list with a (shared) indicator.
Organization sharing🔗
This checkbox can be used to share the layer with all users in your organization.
Click save to export the layer. It will now appear in your list of exported
layers, ready to import into a new
project.
Export to Geotiff🔗
If you need to view or analyze data in packages other than Marigold (such as
QGIS), you can export layers as GeoTIFFs by using the GeoTIFF export tool. After
setting the parameters in the dialog, clicking Export GeoTIFF will start tasks
to export the chosen layers.
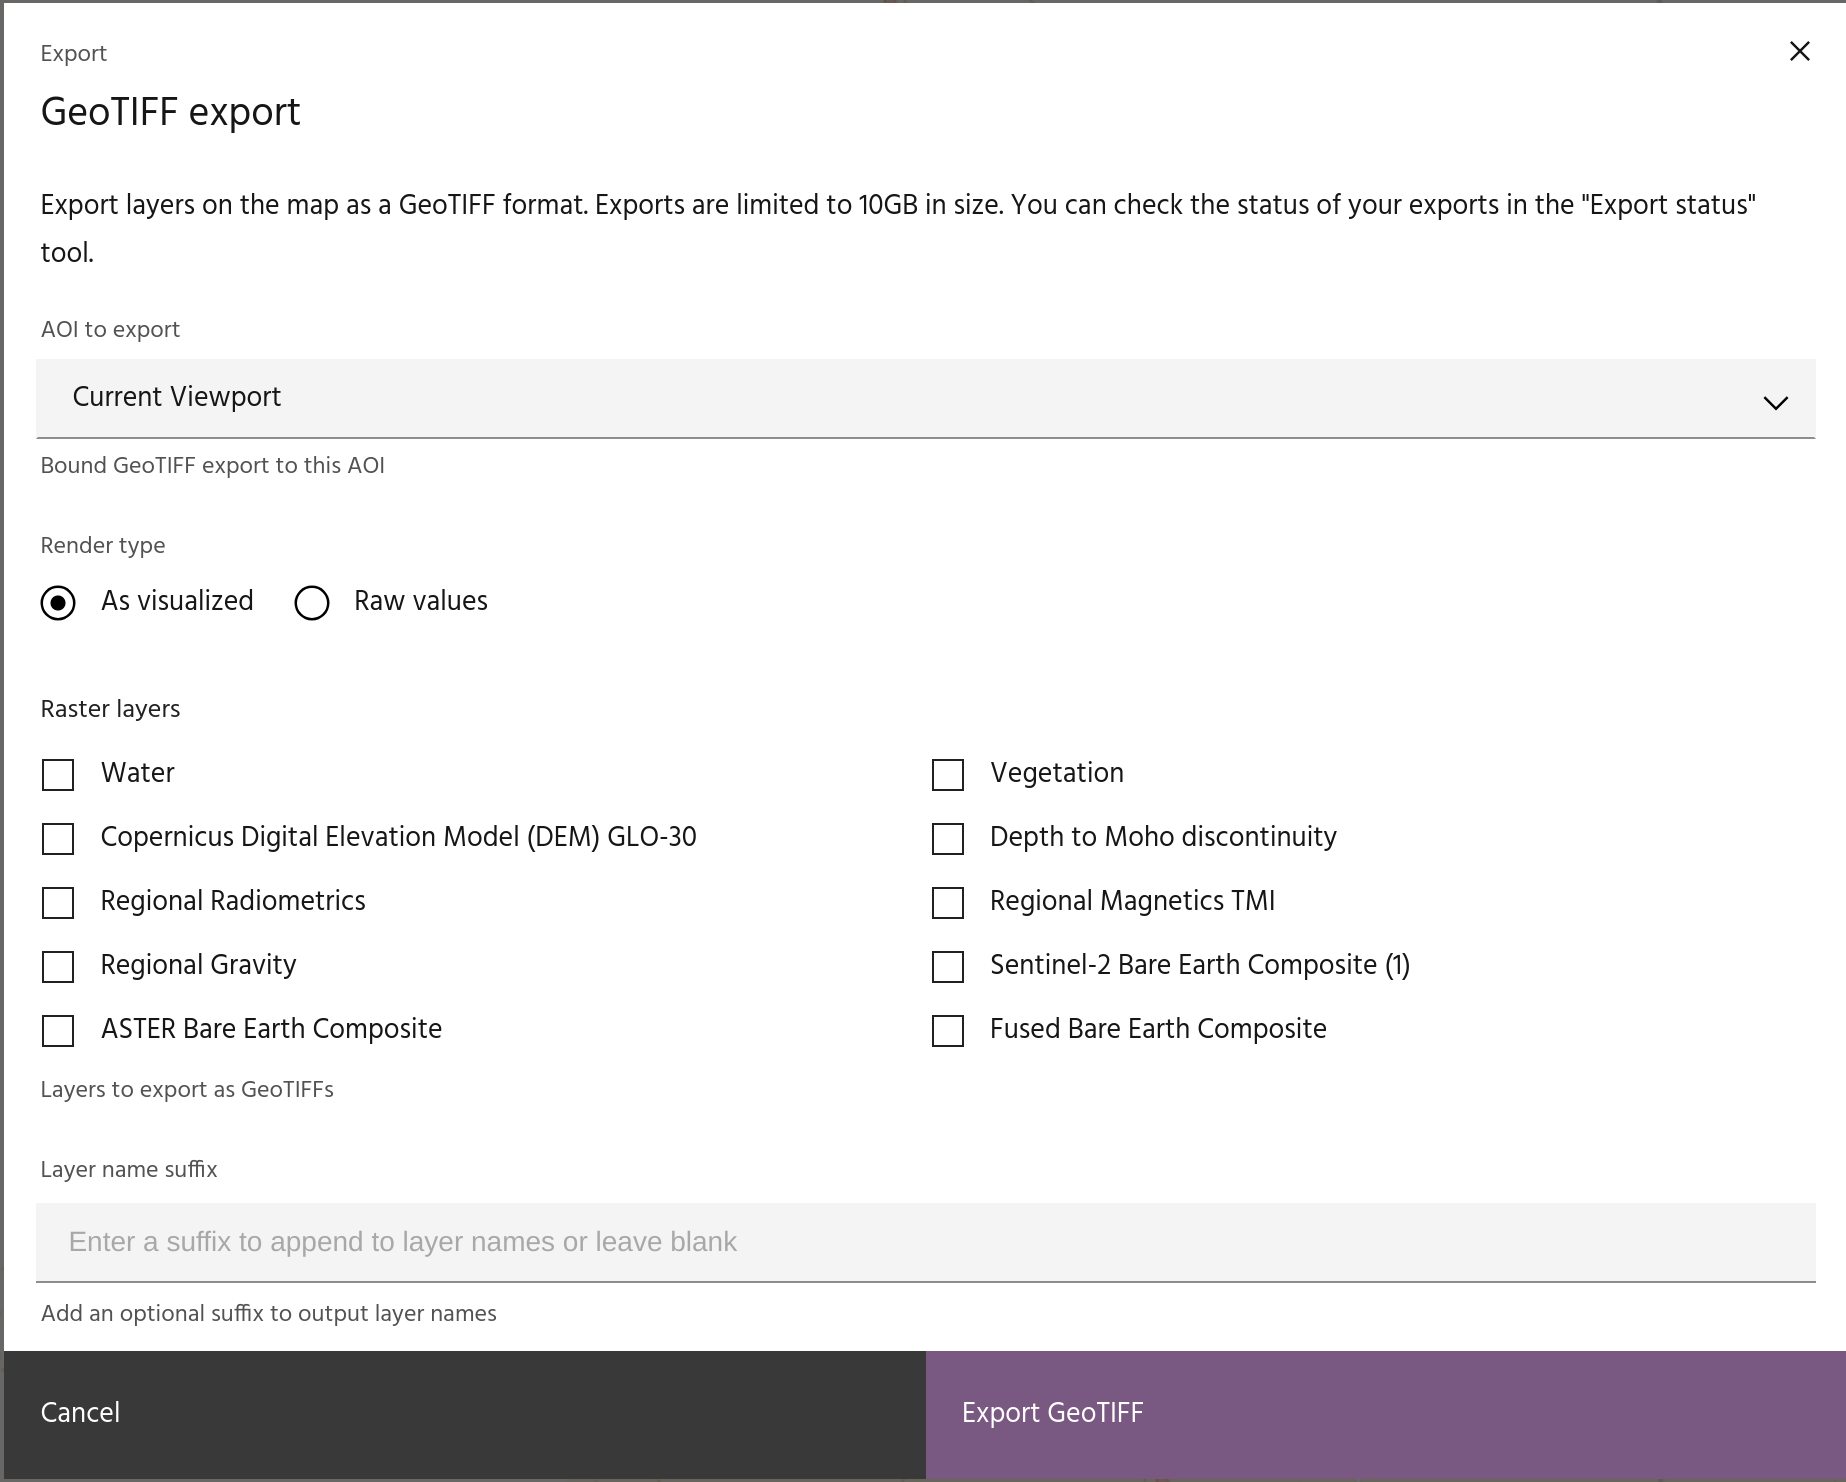
AOI to export🔗
Choose a polygon vector layer over which to export data, or select
Current viewport to export the data over the current map view.
Warning
There is a 10Gb limit for exported data - large AOIs with high resolution layers may not be allowed.
Render type🔗
There are two options for exporting the data:
As visualizedwill export the data exactly as they are currently visualized as 8-bit integers. The currently visualized bands are selected, data are scaled 0-255, and for single band images, the colormap will be mapped to corresponding RGB values. Any visualization options such as extrema masking or hillshades will be applied to the exported layer.Raw valuesoutputs all bands of the data at their full dynamic range as 32-bit floats.
Warning
As visualized, as the name implies, is useful for getting the exact display
from Marigold into another package, but the exported data will not be useful for
further processing.
Raster layers🔗
Select the layers to be exported.
Warning
Restricted data, such as the Bare Earth Composites, cannot be export as
Raw values.
Layer name suffix🔗
If desired, select a suffix to add to the exported name.
Export status🔗
After starting a GeoTIFF export, you can track the status and download the
result using the Export status tool.
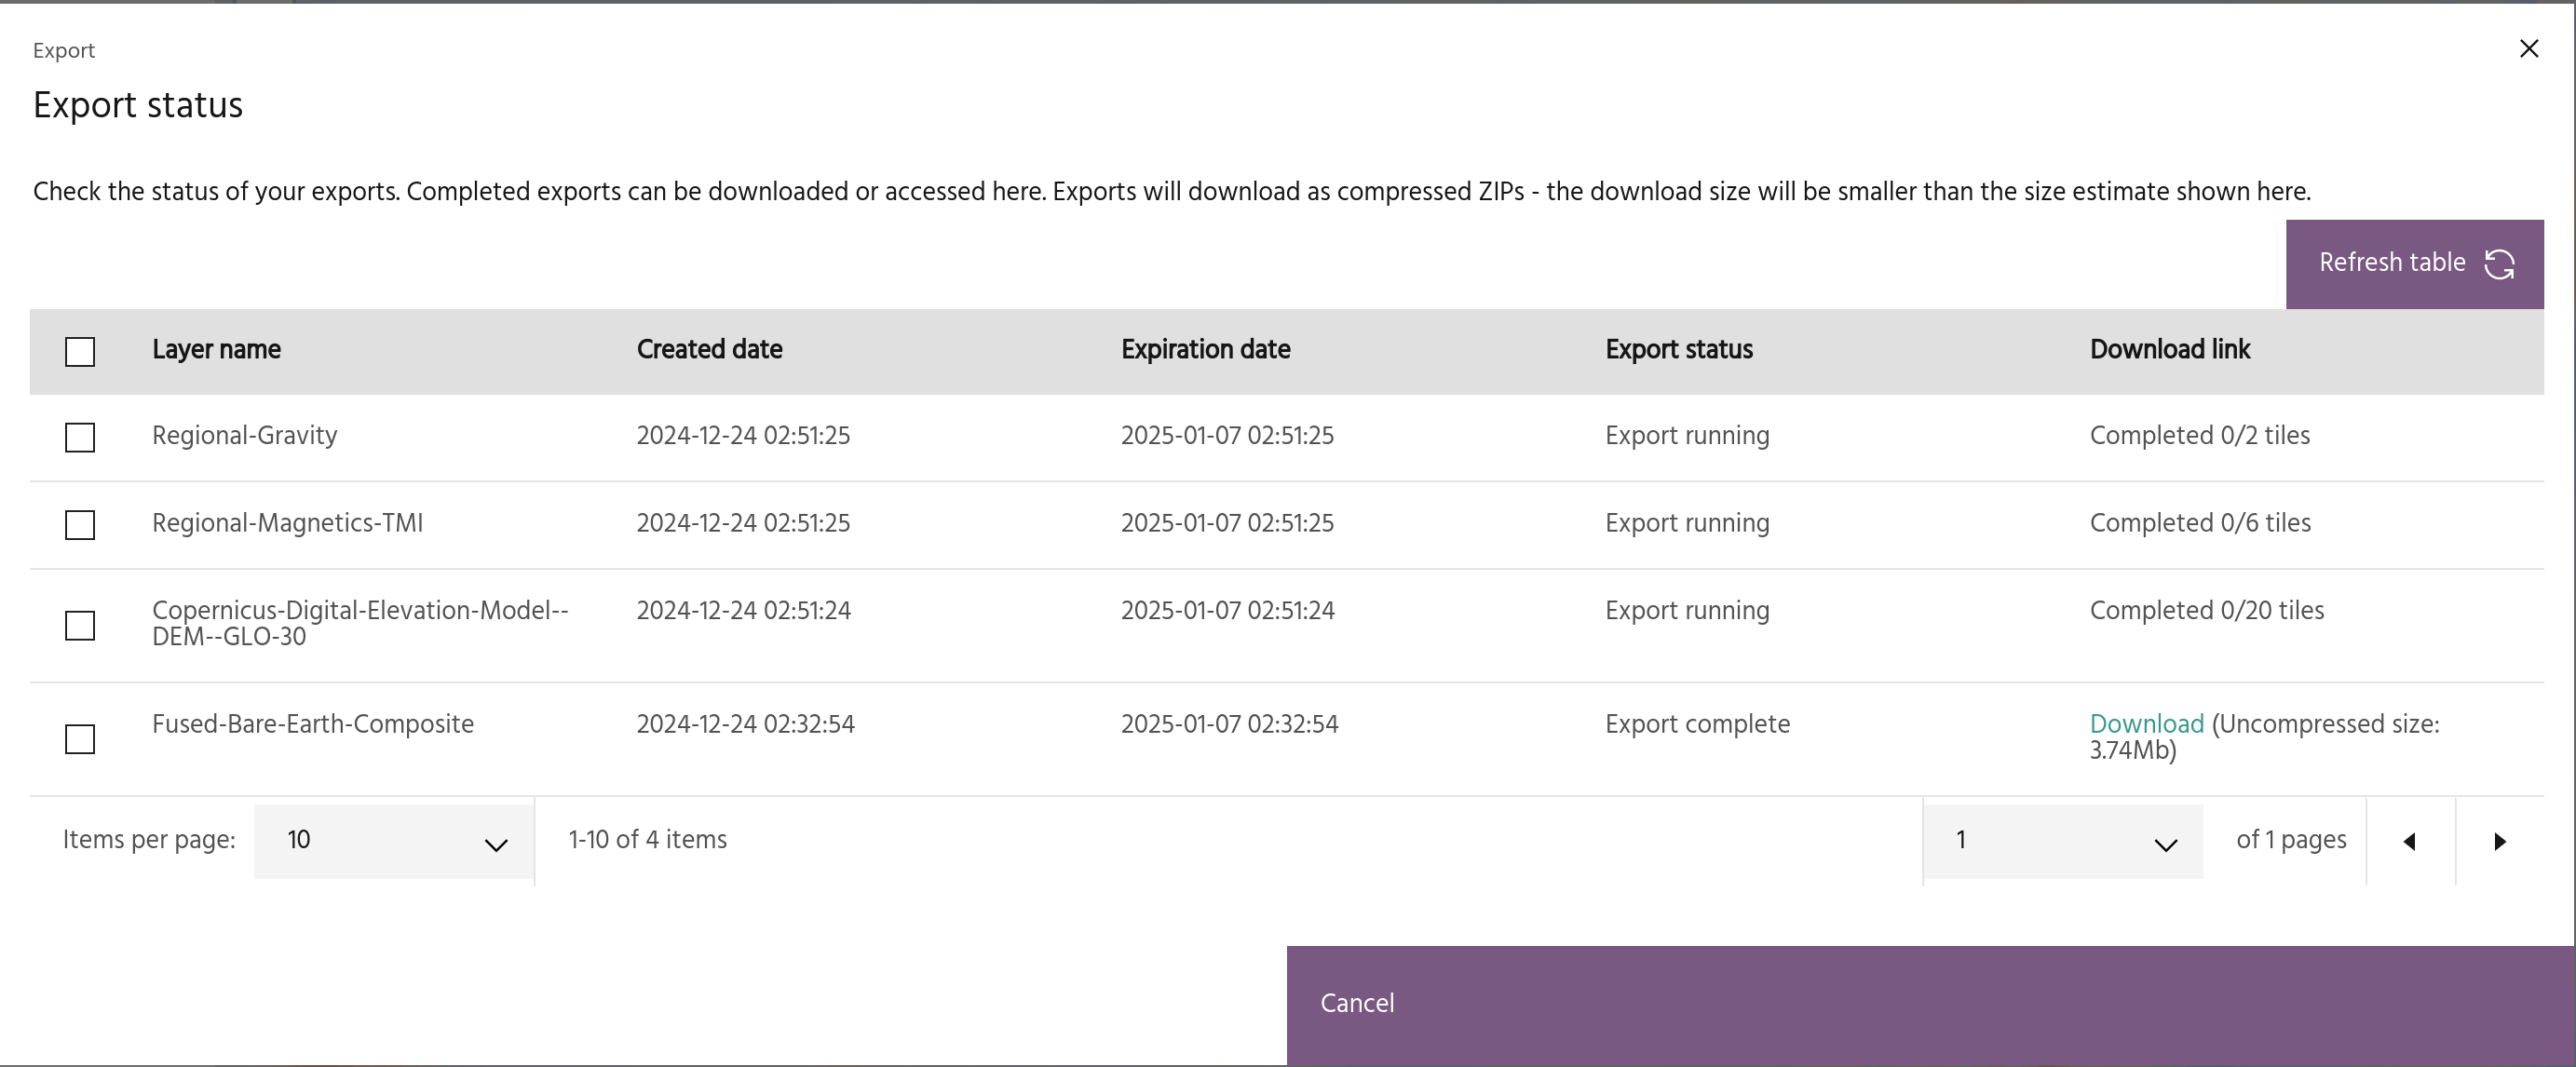
Each exported layer will be represented by a row in this table. The rows will show:
- The layer name, with any suffix if one was added.
- Date the export was created.
- Date the export will expire.
Note
Exports will be automatically deleted after two weeks.
- Status of the export - either running, complete, or failed.
Tip
Failed exports can be retried by selecting the row and clicking Retry exports.
- A status for the export while it is running, or a download link if it has completed.
Tip
Data are split into tiles for export. For easily loading all tiles at once, a VRT containing metadata for the tiles is created, and all of the GeoTIFFs and the VRT are zipped together so that only one file needs to be downloaded.